

Wood stove installation
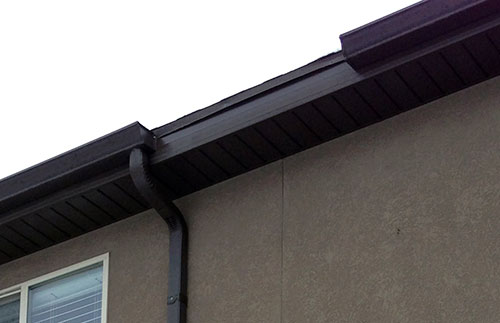
It took a few more months than I hoped, but at least I made it before the coldest part of the winter. As you will recall in my previous posts on home heating, I have been saving and planning for a wood burning stove. As promised, here are photos to document the installation and thoughts on additional things I have learned. First, I wanted to talk about emergency heat in general and encourage you to make sure you are prepared. A wood stove is an substantial purchase, but heating solution should be a top priority only second to food. Do not delay. I read an article in The Magazine about a gentleman named Lex Friedman in New Jersey that suffered through Tropical Storm Sandy. It was a good gut check. He talked about how without power, the temperature in his home continued to drop each day. He dressed his kids in snow clothes and pilled blankets on their beds. It kept getting colder and colder. He said that it tore him apart to hear their cries about how cold they were. He said that he felt like he had failed as a father and as a man. The interesting thing was that this guy considers himself an over-preparer. He has cases of water, food, and batteries. Unfortunately, he didn’t have heat. I was glad that my stove had already been ordered and the installation scheduled. Now on to my stove. As planned, I purchased the Liberty Stove by Lopi. I love it’s simplicity, in terms of build and appearance. Lopi stoves are efficient and durable. I decided not to install a cold-air return above the stove as it would have conflicted with the heat registers coming from my furnace, but I did install two large returns across the room that I believe will still do a great job when I run the fans (when we have power of course). The first step is deciding where to put your stove. As I mentioned, we decided to put ours in our basement in our canning kitchen. In addition to the convenience of having it as an appliance for cooking, it is also strategically placed for optimal heating the rest of the house in regards to both livable space and bedrooms. The stove must sit on tile, stone, or brick. We wanted hardwood floors. We were excited to find a porcelain tile that looks like wood. You also need a flue. If you didn’t build a chimney into your house, this means that the stove will have to be positioned on an exterior wall. Lastly, there are also minimum clearance requirements for all four sides. Be sure to check with the manufacturer and with your city’s building codes. One of the features of the Lopi is it’s double-walled body which provides some of the tightest clearances in the industry. You should also consider that the flue will need to exit between studs as this will affect the micro positioning of the stove along the wall. Soon, I plan on boxing my flue into a formal, stone chimney to match the design of the rest of my house. To avoid working on my rain gutter twice, I cut a gap to accommodate the chimney now. This required me to also install an additional downspout. It took four men to carry the stove in. It weighs over five hundred pounds. The stove comes completely assembled except for the feet and the glass in the door. They removed the firebrick to cut down on the weight while moving the stove (although it didn’t make much difference). All of the parts of the stove are accessible and replaceable without tools however so this is a simple process. 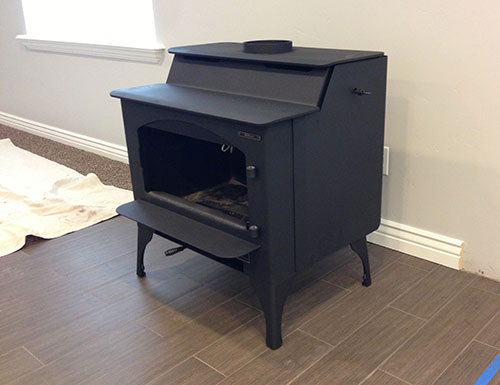 Once inside, the legs were attached and the stove was positioned and leveled. Next, the firebricks were replaced and the glass installed in the door.
 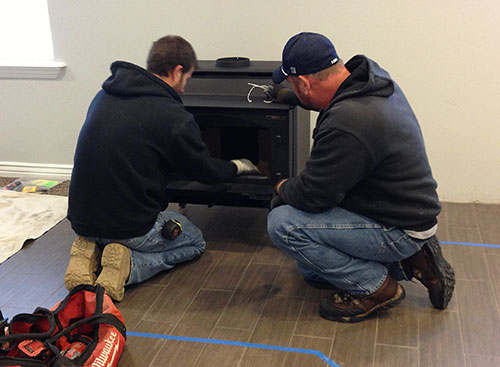 The next step was hard to watch: cutting a large hole through the wall of my house for the flue. It was quickly covered with a plate and fitting though and sealed tight.
 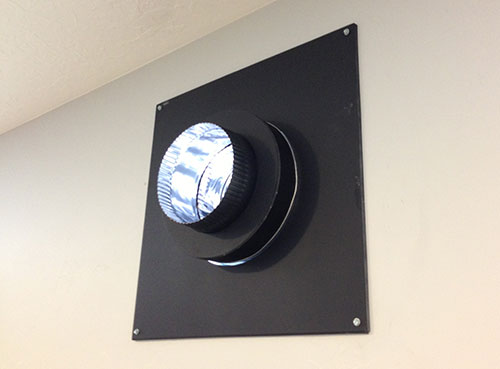 A t-joint connects to this on the outside, allowing for cleaning below and the main section of the flue to rise along the side of the house to the roofline above. I was impressed with the installer’s efforts to keep things sealed tight and the construction compact.
 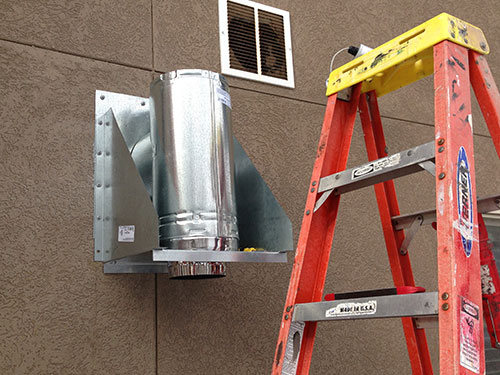 Sections of double-walled, insulated pipe were then stacked until they reached the eaves. Meticulously, they then cut a circular hole through the eaves allowing the pipe to extend up above the roofline. Code requires that a chimney be three feet above the roof where it exits and two feet higher than any part of the roof within ten feet, so it’ll need to be higher than you expect.
 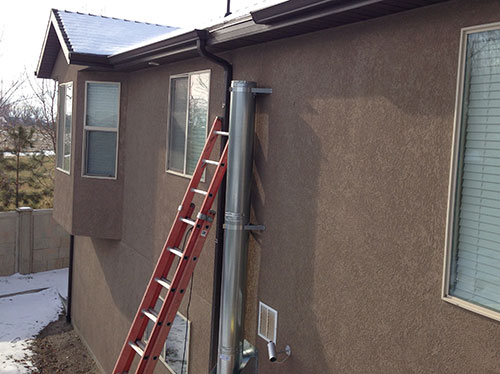 Lastly, back inside, they connected the stove to the wall with more insulated pipe, painted black to match the stove.
  I am very pleased with the stove and the installation. I look forward to a warm winter. I’ll write again on this in the spring with a report on how well it burns, it’s effectiveness for heating my home, and use of the cooktop.