


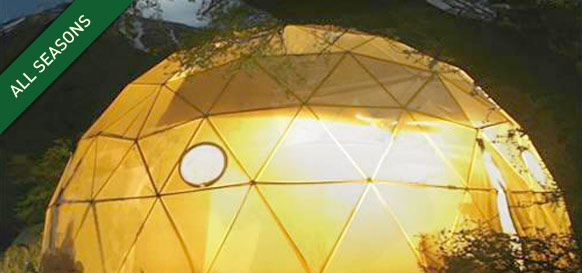
Turtle Tuff Shelter Demonstration
 As a web developer who freelances in addition to my full time employment, I sometimes take advantage of bartering opportunities. Last year one such opportunity presented itself—I was on the lookout for a military surplus tent of some sort, and came across a company (based here in Utah) called Turtle Tuff Shelters who made yurt-like geodesic shelters. Their website at the time was very.. ahem.. lacking, so I suggested a barter. They agreed, and a few months later I became the owner of a 24’ Turtle Tuff Shelter. The interesting thing about these shelters, and the reason I opted to get one of these as opposed to some other form of tent/shelter, is that the structure is a geodesic frame which helps greatly with load bearing, wind resistance, with lightweight, high-strength, tempered, aircraft aluminum alloy rods. The dome shape distributes any weight or force across a broader area, thus minimizing any impact it receives. Each of the individual hubs/joints hold over 300 lbs. because of this design. The frame is designed to withstand almost 150mph winds when staked to the ground. Putting the shelter together has been on my to-do list since last year, but not until today have I made the time to do it. With the help of a friend of mine, I spent the morning putting the tent together—partially, anyways. We assembled the frame and covered it; due to time constraints, we weren’t able to proceed with setting up the floor. Additionally, once the shelter is assembled you determine where you want your door and window to be, and you then cut out material, apply adhesive zippers, etc. I preferred to wait until if/when I actually have to use the shelter before making any permanent alterations to the materials. As seen on their products page, there are several options for purchase. (Note: since I completed the website, they have made certain alterations that I disagree with, namely, that hideous repeating background image… but I digress…) I received the Galapagos Package 4, their high-end offering. Here are the materials (not including the stove) that come in that package:
  The bars (220 lbs. total for this size shelter) are color-coded to denote the three different sizes required to achieve the correct form factor. The large boxes contain the material for the cover and floor, as seen here:
  Getting started was the hardest part. As the geodesic shape forms, the bars begin to (intentionally) bend inwards, making it easier to join the five or six (depending on the joint) bars using the provided bolts, washers, and nuts. To construct the shelter you begin at the top and work your way outward. Here’s the first step:
  Using the provided instructions (which could be improved…), more bars are added according to their color-coded pattern. The first few levels were difficult until we figured out that often the best way to get all the bars to join, and leave enough room on the bolt to secure the washer and nut as well, was to leave one off, tighten everything really well, then remove the washer and nut, add the other bar, and then re-tighten everything. As the nut is secured, the bars each bend slightly; extra force is needed to bend the bars to a sufficient angle. As this progresses, the top of the shelter begins to raise as seen here:
  And here:
  And here:
  And here:
  Here is the shelter before finishing the last level. This level was fairly difficult because pulling the bars in to join together at the right place meant maneuvering a much heavier, larger object.
  Here is the shelter frame fully assembled. At this point we had spent over 3.5 hours. (This is clearly not a quick setup for weekend use; these shelters are meant for long-term living.)
  While I (thankfully) don’t come anywhere close to the 300+ lb. limit for what weight a single joint can handle, here I am doing a pull-up on one of them. This shelter’s design is great for hanging a hammock between two joints, or a shelving system, or any number of other things which could be raised up until the air to maximize living and storage space on the floor.
  The cover provided for this size shelter is a 34 square foot piece of water-tight, UV, puncture, and tear-resistant material, which is a “multi-laminate polymer with rip stop nylon grid fibers”. It will hold out water to 90 lbs. per square inch, and there are no seams through which water can leak. As such, no water-proofing treatments are required, unlike tent canvas or other commonly-used cover material.
  Getting the cover over the frame was very easy with two people tugging back and forth.
  Since the cover is a square, having it conform to the shape of the dome requires making several pleats, folding sections over each other and tucking them underneath the dome, as seen here:
  Here’s the inside of the dome, with the cover over it. It got very warm inside the dome, very quickly. I also obtained insulation material (which we did not try applying), and once the door and window are created, the cross-wind will help create a draft to keep the inside cool.
  Here’s another shot of inside the dome:
  The takedown was extremely quick. What took us almost four hours to set up (frame and cover) took us roughly 20 minutes to disassemble.
  The setup took a bit longer than expected, but I believe that next time we go through it, it will be quicker—not only because we now know how to best assemble it, but also because the bars are each bent to conform to the geodesic shape, and will therefore be quicker and easier to join together. Had I not done the barter to obtain this shelter, I’m not sure if I would have spent the money on one. The price range is a bit high, but I do like the design, space (450+ square feet), portability, and the ability to hang things such as hammocks. Regardless, today’s work to assemble the frame helped me prepare for if/when I ever need to actually use this shelter in a preparedness or other scenario.